-
ckeditor5 및 이미지 업로더 설치개발 2022. 7. 19. 16:33
ckeditor를 몇 번 사용해 본 것 같은데, 버전이 업데이트되면서 설치 방법이나 옵션들이 달라진다.
비단 ckeditor 뿐만이 아니겠지만, 그래도 정확한 것은 사이트 공식 매뉴얼이니 매뉴얼을 보고 설정하는 방법에 익숙해져야겠다.
ckeditor 설치
https://ckeditor.com/ckeditor-5/download/
CKEditor 5 - Download Latest Version
Download a ready-to-use CKEditor 5 Build. Install, download or serve a ready-to-use rich text editor of your choice.
ckeditor.com


다운로드 사이트에 가서 타입을 선택한다.

npm으로 설치해도 되고 압축파일을 다운받아도 되고 CDN을 직접 이용해도 된다.
여기서는 직접 다운로드 받아 설치해 보자.
(ckeditor5 버전은 설치, 라이브러리 등 npm 관련된 부분이 많다. 그래서 npm으로 진행하지 않으면 불편한 부분들이 많이 생긴다.)
아래 주소에서는 플러그인을 직접 선택하고, 언어를 세팅해서 다운로드 받을 수 있다.
(예를 들어 소스보기, 폰트크기, 색상 등을 추가로 넣을 수 있다.)
https://ckeditor.com/ckeditor-5/online-builder/
CKEditor 5 Online Builder | Create your own editor in 5 steps
Create your own CKEditor 5 build with customized plugins, toolbar and language in 5 simple steps.
ckeditor.com

설치는 본인 편한 것으로...
ckeditor 적용
https://ckeditor.com/docs/ckeditor5/latest/installation/getting-started/quick-start.html
Quick start - CKEditor 5 Documentation
Learn how to install, integrate and configure CKEditor 5 Builds and how to work with CKEditor 5 Framework, customize it, create your own plugins and custom editors, change the UI or even bring your own UI to the editor. API reference and examples included.
ckeditor.com

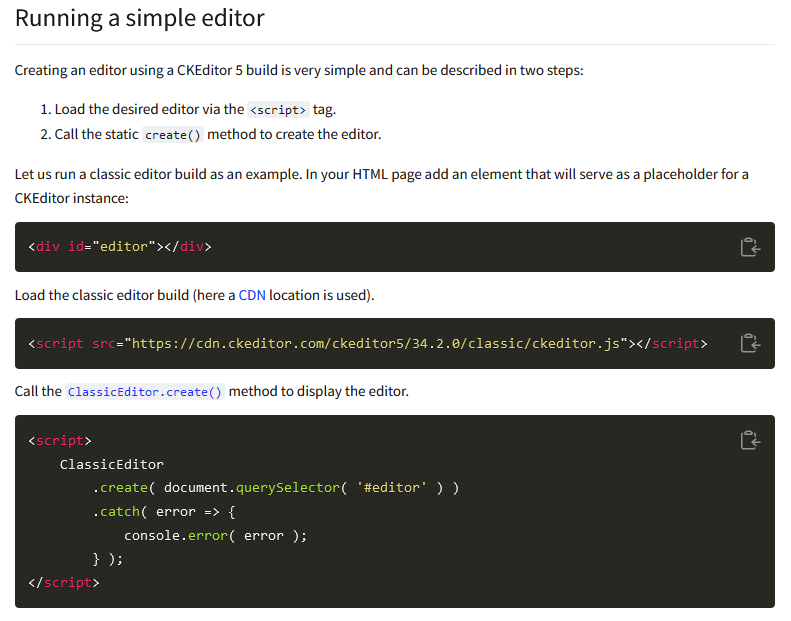
적용하는 방법은 간단하다. 영역을 잡고 함수에 영역을 넘겨주면 된다.
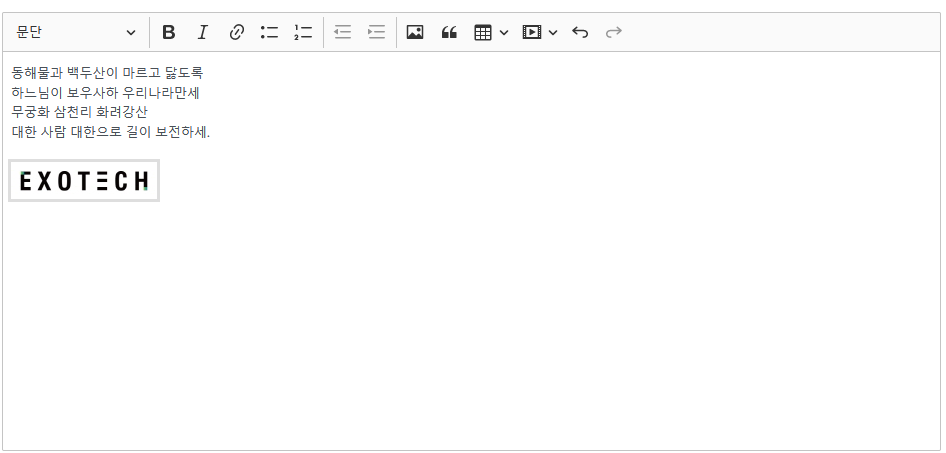
나는 textarea에 적용을 했는데 아래처럼 height가 사라졌다.

그래서 스타일을 추가했다. 높이는 400px, 글자는 13px
<style>
.ck-editor__editable { height: 400px; }
.ck-content { font-size: 13px; }
</style>
형태가 그럭저럭 잘 나왔다.
한글 설정 및 p태그 설정
언어셋을 한글로 설정해보자.
상단에 한글 리소스를 추가하고 에디터 호출 시 언어를 설정해 준다.
<script src="/ckeditor/ckeditor.js"></script>
<script src="/ckeditor/translations/ko.js"></script>
<script> ClassicEditor.create(document.querySelector('#contents'), { language:'ko' }).then(editor => { window.editor = editor; }).catch( error => { console.error( error ); }); </cript>이미 한글을 적용한 상태라 캡처이미지는 모두 한글로 설정되어 있다.

글 작성 후 엔터를 입력하면 줄 사이의 간격이 벌어지는데, 엔터 입력 시 p태그가 추가되기 때문이다.
ckeditor4 버전에는 엔터 입력시 br, div, p 태그 중 선택할 수 있게 되어있었는데, 5 버전에는 없다.
검색해보니 p태그의 마진을 없애라고 설명이 나와있다.(공식적인 설명은 아니다.)
그래서 스타일을 추가했다.
<style>
.ck-editor__editable { height: 400px; }
.ck-editor__editable p {margin: 0}
.ck-content { font-size: 13px; }
</style>
또 작성 후 뷰페이지에도 적용이 되어야 하기 때문에 뷰영역에 클래스를 추가해 뷰 영역만 p태그의 마진이 없도록 했다.

<style>
.ck-editor__editable { height: 400px; }
.ck-editor__editable p {margin: 0}
.ck-content { font-size: 13px; }
.contentsArea p {margin:0}
</style>
<입력폼> 
<뷰화면> 입력할 때도 볼 때도 p태그의 마진을 잘 처리했다.
이미지 업로드
에디터의 이미지 아이콘을 클릭하면 파일을 선택할 수 있는 팝업은 뜨지만 아무런 동작도 하지 않는다.
콘솔에 보면 에러를 확인할 수 있다.

이제 이미지 업로드를 구현해보자.
Base64 upload adapter - CKEditor 5 Documentation
Learn how to install, integrate and configure CKEditor 5 Builds and how to work with CKEditor 5 Framework, customize it, create your own plugins and custom editors, change the UI or even bring your own UI to the editor. API reference and examples included.
ckeditor.com

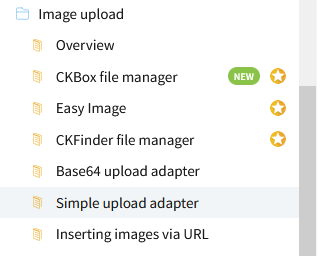
이미지 업로드 방법은 위 링크처럼 몇개가 있다. 금액을 지불하면 쉽게 처리할 수 있는 유료 제품들이다.
무료도 몇개 있는데, Base64 upload는 이미지를 base64로 만드는 방법인데, base64로 인코딩할 경우 보통 30% 이상의 오버헤드가 발생한다. 대용량의 경우 별로 추천하지 못한다고 한다. 여기서는 Simple upload adapter를 이용해본다.
Simple upload adapter는 아래 링크에서 잘 설명이 되어 있어 이곳을 참고했다.
https://jjong-factory.tistory.com/55
CKEditor5 - Web Editor CKEditor5 이미지 업로드
시작에 앞서 일단 CKEditor 를 사용하기로 마음을 먹었는데, 에디터를 커스텀 할 때 가장 첫 번째로 문제가 되는 점은 역시 이미지를 업로드 하는 문제일 것이다. CKEditor는 해당 부분을 굉장히 말끔
jjong-factory.tistory.com
UploadAdapter.js 파일을 구현
먼저 uploadAdpater.js를 구현한다.
class UploadAdapter {
    constructor(loader) {
        this.loader = loader;
    }

    upload() {
        return this.loader.file.then( file => new Promise(((resolve, reject) => {
            this._initRequest();
            this._initListeners( resolve, reject, file );
            this._sendRequest( file );
        })))
    }

    _initRequest() {
        const xhr = this.xhr = new XMLHttpRequest();
        xhr.open('POST', '/common/fms/ckeditor5Upload.do', true);
        xhr.responseType = 'json';
    }

    _initListeners(resolve, reject, file) {
        const xhr = this.xhr;
        const loader = this.loader;
        const genericErrorText = '파일을 업로드 할 수 없습니다.'

        xhr.addEventListener('error', () => {reject(genericErrorText)})
        xhr.addEventListener('abort', () => reject())
        xhr.addEventListener('load', () => {
            const response = xhr.response
            if(!response || response.error) {
                return reject( response && response.error ? response.error.message : genericErrorText );
            }

            resolve({
                default: response.url
            })
        })
    }

    _sendRequest(file) {
        const data = new FormData()
        data.append('upload',file)
        this.xhr.send(data)
    }
}
중간에 서버가 업로드를 처리할 URL를 설정했다.
/common/fms/ckeditor5Upload.do
업로드 시 name은 'upload'로 설정했다.
서버 파일 업로드 구현
서버는 java spring으로 구성했다.
@ResponseBody
    @RequestMapping("/common/fms/ckeditor5Upload.do")
    public void fileUpload( MultipartHttpServletRequest multiRequest, HttpServletRequest request, HttpServletResponse response) {
		try {
	    	final String real_save_path = MainGlobals.FILE_STORE_PATH + "/contents/";

	    	// 폴더가 없을 경우 생성
	    	File saveFolder = new File(EgovWebUtil.filePathBlackList(real_save_path));
    		if(!saveFolder.exists() || saveFolder.isFile()) {
    			saveFolder.mkdirs();
    		}

			final Map<String, MultipartFile> files = multiRequest.getFileMap();
			MultipartFile fileload = (MultipartFile)files.get("upload");

		    //filename 취득
		    String fileName = fileload.getOriginalFilename();

		    int index = fileName.lastIndexOf(".");
			String ext = fileName.substring(index+1);
			Random ran = new Random(System.currentTimeMillis());
			fileName = System.currentTimeMillis()+"_"+(int)(ran.nextDouble()*10000)+"."+ext;

		    //폴더 경로 설정
		    String newfilename = real_save_path + File.separator + fileName;
		    fileload.transferTo(new File(EgovWebUtil.filePathBlackList(newfilename)));

			JSONObject outData = new JSONObject();
			outData.put("uploaded", true);
			outData.put("url", request.getScheme() + "://" + request.getServerName() + ":" + request.getServerPort() + "/common/fms/getImageForContents.do?fileNm=" + fileName);
			response.setContentType("application/json");
			response.setCharacterEncoding("UTF-8");
			response.getWriter().print(outData.toString());
	    } catch (Exception e) {
	    	System.out.println("오류발생");
	    }
	}
서버의 업로더는 json형태로 반환해주는데 key값으로 url을 넘겨준다.
url은 /common/fms/getImageForContents.do로 했다.
@RequestMapping("/common/fms/getImageForContents.do")
public void getImageForContents(SessionVO sessionVO, ModelMap model, @RequestParam Map<String, Object> commandMap, HttpServletResponse response) throws Exception {
    String fileNm = (String)commandMap.get("fileNm");
    String fileStr = MainGlobals.FILE_STORE_PATH + "contents/";

    File tmpDir = new File(fileStr);
    if(!tmpDir.exists()) {
        tmpDir.mkdirs();
    }

    FileInputStream fis = null;
    BufferedInputStream in = null;
    ByteArrayOutputStream bStream = null;

    try {

        fis = new FileInputStream(new File(fileStr, fileNm));
        in = new BufferedInputStream(fis);
        bStream = new ByteArrayOutputStream();

        int imgByte;
        while ((imgByte = in.read()) != -1) {
            bStream.write(imgByte);
        }

        String type = "";
        String ext = fileNm.substring(fileNm.lastIndexOf(".") + 1).toLowerCase();

        if ("jpg".equals(ext)) {
            type = "image/jpeg";
        } else {
            type = "image/" + ext;
        }

        response.setHeader("Content-Type", type);
        response.setContentLength(bStream.size());

        bStream.writeTo(response.getOutputStream());

        response.getOutputStream().flush();
        response.getOutputStream().close();

    } finally {
        EgovResourceCloseHelper.close(bStream, in, fis);
    }
}
클라이언트에 Upload Adapter 설정
다시 클라이언트 설정을 해보자.
만들어진 'UploadAdapter.js'를 추가하고 , 에디터 생성 시 'extraPlugins'이름으로 함수를 만들어 추가해준다.
<script src="/ckeditor/ckeditor.js"></script>
<script src="/ckeditor/translations/ko.js"></script>
<script src="/ckeditor/UploadAdapter.js"></script>
function MyCustomUploadAdapterPlugin(editor) { editor.plugins.get('FileRepository').createUploadAdapter = (loader) => { return new UploadAdapter(loader) } } ClassicEditor.create(document.querySelector('#contents'), { language:'ko', extraPlugins: [MyCustomUploadAdapterPlugin] }).then(editor => { window.editor = editor; }).catch( error => { console.error( error ); });let editor_data = editor.getData();호출된 에디터의 데이터는 위처럼 호출할 수 있다.
함수 호출 성공 시 window.editor에 editor를 추가하는데, 전역 객체인 window를 생략할 수 있어 editor에 직접 getData()를 호출할 수 있다.

이미지 업로드 성공!!
XSS 필터
소스내에 html 태그가 변환되지 않도록 보안상의 이유로 필터에 변환 함수를 추가 했었다.
private String cleanXSS(String value) { if(type == 1) { value = value.replaceAll("<s.*>.*</script>",""); value = value.replaceAll("(\\.location|location\\.|onload=|\\.cookie|alert\\(|window\\.open\\(|onmouse|onkey|onclick|view\\-source\\:)+", "/"); } else if(type == 2){ value = value.replaceAll("<", "<").replaceAll(">", ">"); value = value.replaceAll("eval\\((.*)\\)", ""); value = value.replaceAll("[\\\"\\\'][\\s]*javascript:(.*)[\\\"\\\']", "\"\""); } return value; }
그래서 에디터로 작성된 태그들이 모두 변환되어 실제 뷰에서는 태그가 적용되지 않았다.
그래서 필터에 예외값을 두기로 했다.
public void doFilter(ServletRequest request, ServletResponse response, FilterChain chain) throws IOException, ServletException {
    int[] b = isNotFindXSS(request);
    if(b[0] == 1) {
        if(b[1] == 0) {
            chain.doFilter(new XssWrapper((HttpServletRequest)request, type), response);
        } else {
            // Xss 필터를 통과하지 않고 그냥 지나친다.
            chain.doFilter(request, response);
        }
    } else {
        // 비정상적 요청인 경우 경고 페이지로 이동
        RequestDispatcher dispatcher = request.getRequestDispatcher(infoUrl);
        dispatcher.forward(request, response);
    }
}

public int[] isNotFindXSS(ServletRequest request) {
    ArrayList<String> params = new ArrayList();
    String name = "";
    String value = "";
    int[] b = {1, 0};

    Enumeration names = request.getParameterNames();

    while(names.hasMoreElements()) {
        name = (String)names.nextElement();
        value = request.getParameter(name);
        params.add(value);

        if(name.equals("passKey")) {
            b[1] = 1;
        }
    }
    return b;
}
다시 등록 및 수정 페이지에서 에디터를 이용할 경우 예외를 추가할 수 있도록 키를 추가한다.
<form:form commandName="dmsBrdPostVO" id="detailForm" action="${requestScope['javax.servlet.forward.request_uri']}" enctype="multipart/form-data"> ... <input type="hidden" name="passKey" /> </form:form>반응형'개발' 카테고리의 다른 글
Ubuntu 18.04 크론 오류 해결 (0) 2023.03.24 ckeditor 5 이미지 크기 변환 (1) 2022.08.10 오라클 11g exp/imp 을 이용한 백업 및 복원 (0) 2022.07.18 CentOS 7.9에서 mongoDB 설치하기 (0) 2022.04.20 MaxOS에서 mongoDB 설치 (0) 2022.04.14